Starting out with ear stretching, it's pretty normal for ear gauge sizes to seem a bit confusing, you know? It’s a whole new language for your ears, and that can feel a little much at first. But, honestly, once you get the hang of how we measure these things, it gets much clearer. It’s not nearly as hard as it might appear. So, let’s talk about what you really need to know when it comes to finding the right fit for your ears.
A lot of people are curious about stretching their ears, and it’s a cool way to express yourself, but getting the sizes right is really important. Picking the wrong size can cause problems, and we definitely want to avoid that. This article is here to help you understand the different measurements and how they all work together. We’ll look at the common ways ear jewelry is sized and how those numbers relate to actual measurements, like millimeters.
Whether you’re just thinking about starting your stretching journey or you’ve already begun and need a clearer picture of the next steps, this guide is for you. Knowing the different ear gauge sizes is very important for a safe and comfortable experience. We’re going to give you all the information you need, so you can feel good about your choices and keep your ears happy.
Table of Contents
- What Are Ear Gauges, Anyway?
- The Gauge System: Decoding the Numbers
- Why Size Matters: Safety and Comfort
- Choosing Your First Gauge Size
- Understanding the Ear: A Quick Look at Anatomy
- Tips for a Smooth Stretching Experience
- Finding Your Fit: Where to Look for Jewelry
- Frequently Asked Questions About Ear Gauge Sizes
- Final Thoughts on Ear Gauge Sizes
What Are Ear Gauges, Anyway?
When people talk about "ear gauges," they’re usually referring to the jewelry used to stretch ear piercings, or sometimes the stretched piercing itself. It's a way to gradually make the hole in your earlobe bigger. The jewelry comes in various shapes and materials, but the most important thing is their size. That size is typically given as a "gauge" number, or in millimeters, so you know what you’re getting.
It's interesting, but the term "gauge" actually describes the thickness of the jewelry. Think of it like wire; a smaller gauge number means a thicker piece of jewelry. This can be a bit confusing for folks just starting out, because it feels a little backwards. However, once you grasp this basic idea, understanding ear gauge sizes becomes much simpler. It’s just a measurement system, after all.
The whole idea behind ear stretching is to move up in size slowly and carefully. You don't just jump from a tiny earring to a large plug overnight. That would cause a lot of harm, and nobody wants that. Instead, you use a series of gradually larger pieces of jewelry, allowing your earlobe to adapt over time. It’s a process that needs patience, and really, the right information.
The Gauge System: Decoding the Numbers
Ear gauges are generally represented by a numerical gauge size. This system can seem a bit odd because, as we said, the smaller the number, the bigger the actual jewelry piece. For instance, a 20 gauge is quite small, while a 00 gauge is much, much larger. It’s a little like how some other measurement systems work, where lower numbers mean bigger things, so it’s not completely unique.
These gauge sizes, often called gauge numbers, start from the very smallest, which is typically around 20 gauge or 18 gauge. These are often the sizes standard ear piercings are made at, so you might already have a hole that fits these. From there, the sizes go up in a specific sequence, usually in even numbers. So, you might go from 18g to 16g, then 14g, and so on. It's a clear progression, which is helpful.
If that whole "smaller number means bigger size" thing feels too confusing for you, then you can simply use ear gauge sizes in millimeters. That's often a much more intuitive way for people to think about it. With millimeters, it's straightforward: the smaller the number, the smaller the piercing. A 2mm piece is smaller than a 4mm piece, which makes perfect sense. Many jewelry pieces, including ours, are marked in both gauge size and millimeters, so you’ll know exactly what size you’re getting, which is rather convenient.
From Smallest to Largest: The Gauge Progression
Let's look at how the sizes typically increase. Standard ear piercings, the ones you get at a jewelry store or piercing shop, are usually done at 20 gauge or 18 gauge. These are tiny holes, just big enough for most regular earrings. From there, if you’re stretching, the gauge sizes go up in even numbers. So, you’d move to 16 gauge, then 14 gauge, then 12 gauge, 10 gauge, and so on. This gradual increase is very important for your ear’s health.
The progression continues through 8 gauge, 6 gauge, 4 gauge, 2 gauge, and 0 gauge. After 0 gauge, things get a little different. The next size up is usually 00 gauge, which is a common goal for many people stretching their ears. After 00 gauge, which is about 9.2 millimeters, the sizing system often switches entirely to millimeters or inches. This is because the gauge system doesn't really extend much beyond 00g in a consistent way. It's just how the industry evolved, so it’s something to be aware of.
Knowing this progression helps you plan your stretching journey. You can see the steps laid out, and it makes the whole process feel less mysterious. It's really about understanding these increments and respecting them. Each step is a little bigger than the last, allowing your earlobe tissue to gently expand without tearing or damage. This careful approach is key to keeping your ears healthy and looking good.
Beyond Gauge: Millimeters and Inches
Once you move past the 00 gauge mark, the ear stretching community typically relies on millimeters for sizing. This is where the measurements become much more straightforward for many people. For example, after 00 gauge (which is around 9.2mm), you might see sizes like 10mm, 12mm, 14mm, and so on. This makes it easier to visualize the actual size of the jewelry. It's a very practical shift, honestly.
Some people also use inches, especially in certain regions or for very large sizes. You might hear someone say they are at a "half-inch" or "five-eighths of an inch." These also correspond to specific millimeter measurements. For instance, a half-inch is roughly 12.7mm, and five-eighths of an inch is about 15.9mm. This flexibility in measurement units means you can always find a way to understand the size, which is quite helpful.
To help you choose the right size with ease, it’s really useful to have a clear breakdown of common ear piercing gauge sizes along with their measurements in millimeters and sometimes inches. This kind of chart makes conversions simple and clear. It’s like a quick reference guide, so you can always double-check your understanding. Having this information handy means you can feel more confident about selecting the correct jewelry for your ears.
Why Size Matters: Safety and Comfort
Understanding the different ear gauge sizes is very important to ensure a safe and comfortable piercing experience. If you try to stretch too quickly or use a size that's too big, you risk tearing your earlobe. This can cause pain, bleeding, infection, and even permanent damage. Nobody wants that, so it’s something to take seriously.
When you stretch slowly and carefully, your earlobe tissue has time to adapt and heal. This means less pain, less risk of complications, and a much healthier outcome for your ears. It’s about respecting your body’s limits and giving it the time it needs. Think of it like building muscle; you don’t go from lifting five pounds to fifty pounds overnight. It’s a gradual process, and your ears are no different, in a way.
Comfort is also a big part of it. Jewelry that’s too tight can be painful and cause irritation. Jewelry that’s too loose might fall out. The right size will feel snug but not painful, allowing for good circulation and comfort. It’s about finding that sweet spot where your ears feel good and the jewelry stays put. This really does make a difference in your day-to-day experience.
Choosing Your First Gauge Size
If you’re beginning your ear stretching journey, choosing the very first gauge size is a big step. Most standard ear piercings are done at 20 gauge or 18 gauge. So, if your ears are already pierced, you’re likely starting from one of these points. It’s important to know what size your current piercing is before you even think about stretching, so you have a clear starting point.
When you’re ready to start stretching, you generally want to go up by one gauge size at a time. For example, if you’re at 18 gauge, your first stretch would be to 16 gauge. If you're already at 14 gauge, you'd go to 12 gauge. This small increment is crucial for preventing damage and allowing your earlobe to adjust properly. It’s a slow and steady wins the race kind of situation, you know?
It's also a good idea to consult with a professional piercer if you’re unsure. They can assess your earlobes and give you personalized advice on where to start and how to proceed safely. They often have a lot of experience and can offer really helpful tips. Getting expert guidance can make a big difference in having a positive stretching experience, which is what we all want.
Understanding the Ear: A Quick Look at Anatomy
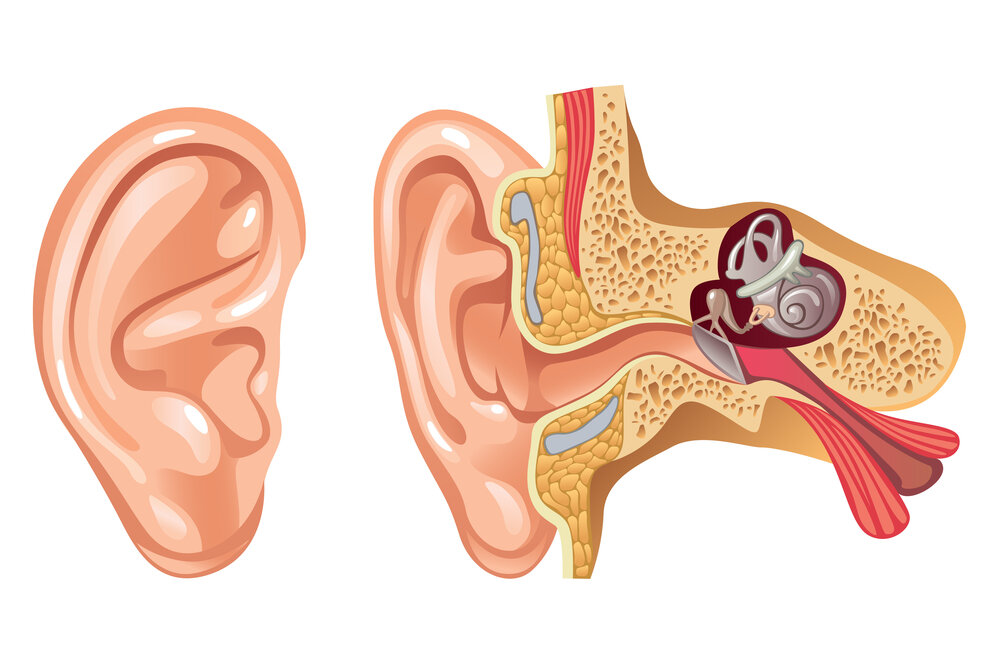
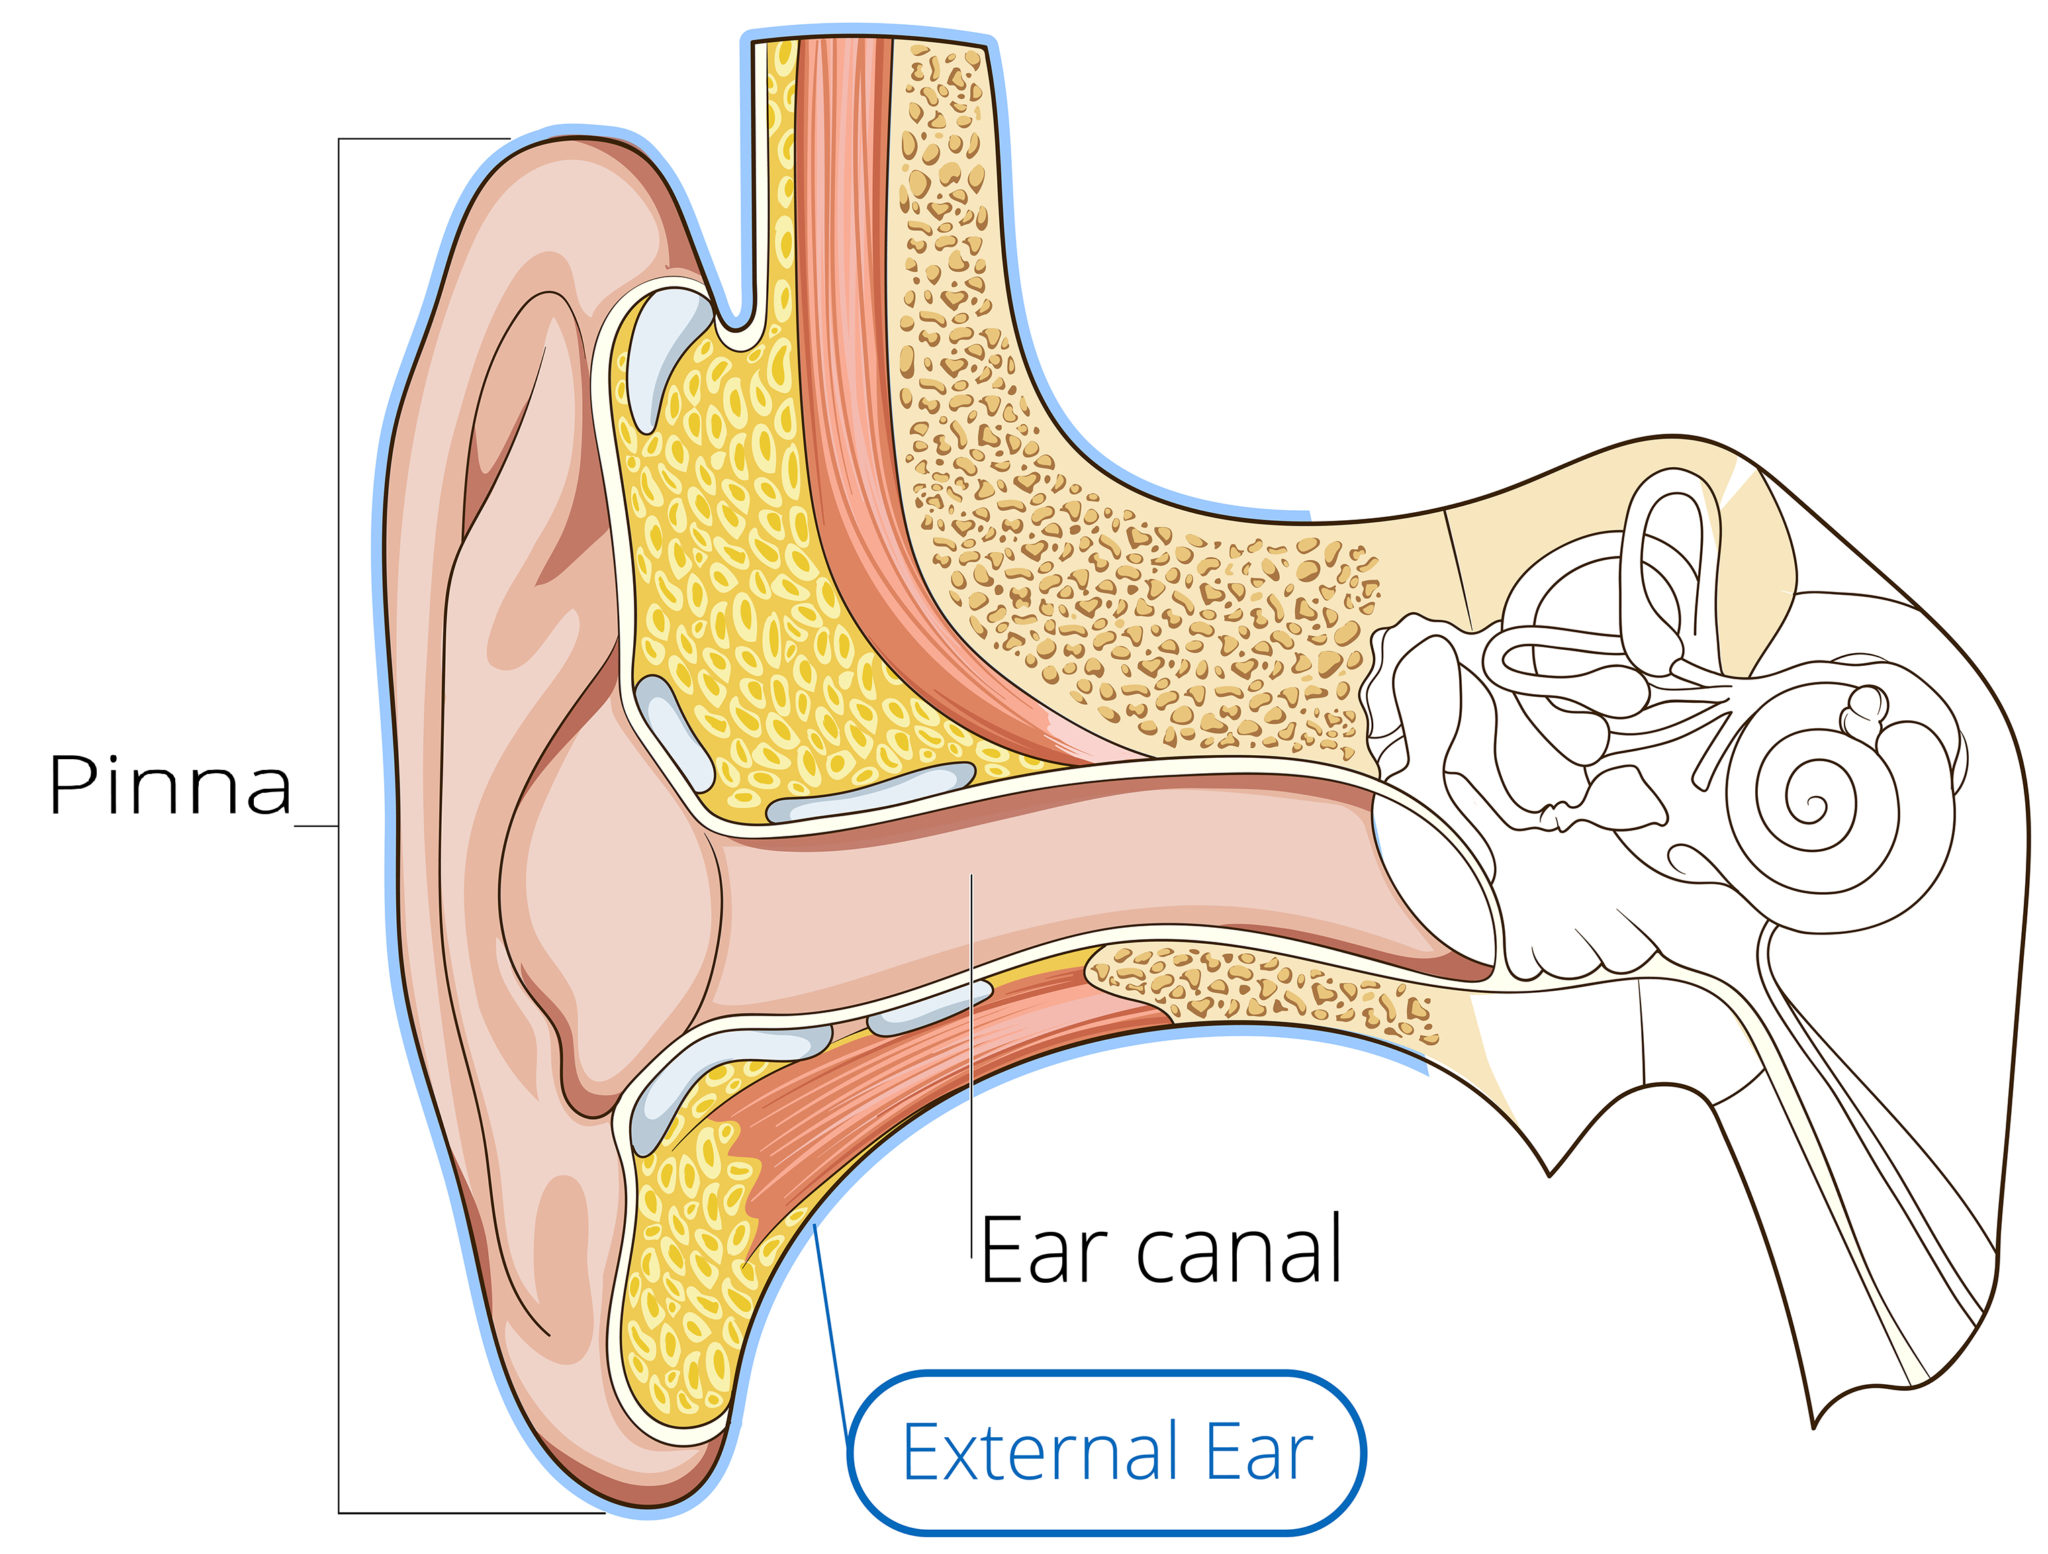
While this article focuses on ear gauge sizes, it’s worth a quick mention of the ear itself. The ear is an amazing organ that helps us hear and, for mammals, also helps with balance. In humans, the ear has three main parts: the outer ear, the middle ear, and the inner ear. Knowing a little about these parts helps you appreciate why ear health is so important, especially when you’re thinking about body modifications.
The outer ear is what you see, and it collects sound waves, channeling them into the ear canal. This canal leads to the eardrum, which is a flexible membrane. The middle ear then takes these vibrations and sends them to the inner ear, where they are turned into signals our brain can understand as sound. The inner ear also has structures that help us keep our balance. It’s a pretty complex system, honestly.
When you’re stretching your earlobes, you’re primarily working with the soft tissue of the outer ear. While this tissue is quite pliable, it still needs to be treated with care. Understanding that the ear is a sensory organ for both hearing and balance just reinforces the idea of being gentle and patient with any modifications. It’s about respecting your body, you know, and keeping it healthy.
Tips for a Smooth Stretching Experience
For a really good stretching experience, patience is probably the most important thing. Don't rush the process. Your earlobes need time to heal and adapt between each size increase. This could mean waiting weeks, or even months, before moving up to the next gauge. It really depends on your body and how it responds, so listening to your body is key.
Lubrication is another very helpful tip. When inserting new jewelry, using a body-safe lubricant, like jojoba oil or a specialized stretching balm, can make the process much smoother and less irritating. This helps the jewelry slide in gently without causing unnecessary friction or tearing. It’s a simple step that can prevent a lot of discomfort, and it's quite effective.
Keeping your ears clean is also very important. Regular, gentle cleaning with a mild, fragrance-free soap and warm water helps prevent infections. You want to make sure the area around your stretched piercing stays healthy. Good hygiene is always a good idea, especially with any kind of body modification. So, just be mindful of that.
Finding Your Fit: Where to Look for Jewelry
When you’re ready to buy new jewelry, it’s helpful to know that all of our jewelry is marked in both gauge size and in millimeters. This means you’ll know exactly what size you’re getting, taking away a lot of the guesswork. It makes shopping much easier when the information is clear and consistent. This transparency is pretty important, honestly.
Look for reputable sellers who provide clear sizing information and use body-safe materials. Materials like surgical stainless steel, glass, and titanium are generally good choices for stretching, as they are less likely to cause irritation. Avoiding cheap, low-quality materials can prevent a lot of problems down the line. It's an investment in your ear health, really.
Use an ear gauge size chart to see common jewelry sizes and how gauge size converts to millimeters and inches. Many online stores and piercing studios will have these available. This chart is a handy tool to cross-reference sizes and ensure you’re making an informed choice. It’s like having a quick reference guide right there, which is very convenient.
Frequently Asked Questions About Ear Gauge Sizes
What is a standard ear piercing gauge size?
A standard ear piercing is usually done at a 20 gauge or an 18 gauge. These are the smallest sizes for initial piercings, allowing for a wide range of regular earrings. It’s where most people begin their ear jewelry journey, so it’s a good starting point to remember.
How do gauge sizes convert to millimeters?
The gauge system is inverse, meaning a smaller gauge number indicates a larger size. For example, a 20 gauge is about 0.8mm, an 18 gauge is about 1.0mm, and a 00 gauge is around 9.2mm. After 00 gauge, sizes are typically measured directly in millimeters, like 10mm, 12mm, and so on. This makes it much simpler to understand the actual physical size of the jewelry.
How long does it take to stretch ears to a larger gauge?
The time it takes to stretch ears varies a lot from person to person, but patience is key. It's generally recommended to wait at least 4-6 weeks, or even longer, between each stretch to allow the earlobe to heal and adapt properly. Rushing can cause damage, so a slow and steady approach is always best for healthy ears. It's a process that really can't be rushed.
Final Thoughts on Ear Gauge Sizes
So now that you know everything you need to about ear gauge sizes, you’re much better prepared for your ear stretching journey. Remember, it's about being patient and informed. Understanding the sizing system, whether you prefer gauges or millimeters, is very important for a safe and comfortable experience. You’ve got this, honestly.
Always prioritize your ear health. Take your time with each stretch, use good quality jewelry, and keep everything clean. If you ever feel unsure, talking to a professional piercer is always a good idea. They can offer guidance that's specific to your situation. Learn more about piercing aftercare on our site, and for more specific information about ear stretching materials, you can check out that page too. Your ears will thank you for the care and attention.
For more general information on body modification safety, consider visiting a trusted resource like the Association of Professional Piercers (APP) website. They offer a lot of great advice. It’s really about making informed choices for your body, and having good resources helps a lot. Happy stretching, and stay safe!